A classic that never goes out of style, mac and cheese adds comfort and decadence to any dinner. You’ve come to the perfect spot if you’re craving the creamiest, cheesiest mac & cheese that will have everyone begging for more! Here’s a tried-and-true recipe for the best mac and cheese, from perfecting the roux to choosing the right cheeses.
Choose the Correct Pasta First
https://www.ameba.jp/profile/general/tusmudo123/
https://www.ameba.jp/profile/general/tvdramanice123/
https://www.ameba.jp/profile/general/dramanowtv123/
https://comunitat.canodrom.barcelona/profiles/tvdramanow/activity?locale=en
https://comunitat.canodrom.barcelona/profiles/Tvdramanice/activity?locale=en
Choosing the correct pasta is the first step in creating delicious mac and cheese. The best elbow macaroni is the classic variety, particularly if it includes ridges. More of that creamy sauce is perfectly captured by these little ridges. Remember that the first step to giving your food a wonderful flavor is to salt your pasta water.
Select the Ideal Cheeses
The proper cheese is crucial when it comes to mac and cheese. You can use any type of cheese, although sharper varieties are the best. Sharper cheeses will stick out and give your mac and cheese that deep, savory punch, while milder cheeses may blend in with the sauce.
Pro Tip: Shred your own cheese every time! Anti-caking chemicals found in pre-shredded cheese may have an impact on the texture and melt. Better flavor and a smoother, creamier sauce are guaranteed when you shred your own. In a food processor, you can quickly and easily prepare roughly 5 cups of shredded cheese, which is usually the ideal quantity for this dish.
Creating the Roux: Your Sauce’s Basis
Making the ideal roux is essential to creating a creamy mac & cheese sauce. Butter is the main ingredient of a roux, which is created with equal amounts of flour and fat. Six tablespoons of butter are needed to create a thick, delicious base.
In a large pan over medium heat, melt the butter.
Stir continuously for 3–4 minutes after whisking in the flour. To ensure a smooth sauce and get rid of any starchy taste, this step is essential.
Add the milk and creaminess and whisk
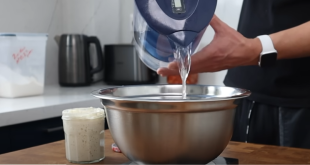
When the roux is prepared, the milk should be added. You can get the richness you need for that decadent creamy texture by using full milk. Heavy cream can be used in place of some or all of the milk if you’re feeling very decadent. We use roughly 3.5 cups of full milk for this recipe.
To temper the richness of the sauce, add a tiny pinch of mustard powder (about ¼ teaspoon) and whisk it in before adding the milk.
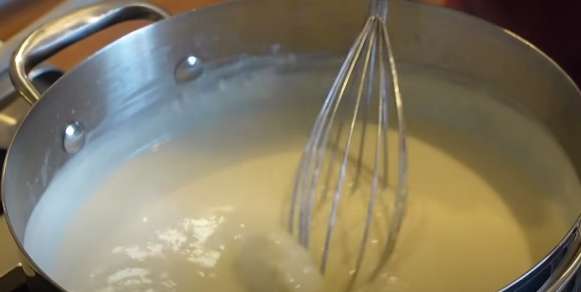
Perfectly Simmering the Sauce
After whisking in the milk, bring the liquid to a simmer, stirring occasionally. The sauce will begin to thicken at this point. To get the desired consistency, continue to simmer for approximately five minutes. The sauce shouldn’t be overly thin; it should be creamy and silky.
For added creaminess, add cream cheese.
Add 3 ounces of cream cheese to the sauce for an additional layer of richness. Your mac and cheese will have an appealing depth of flavor thanks to the cream cheese’s tanginess, which will perfectly balance the richness of the other cheeses. Before proceeding to the following step, allow it to completely melt into the sauce.
Add the cheese and season.
To taste, add a pinch of salt and pepper to the sauce. The time has come to add the cheese shreds. Add two cups of the shredded cheese to the sauce first, and stir until it melts completely. We’ll use the remaining cheese for topping and layering.
Pasta Cooking & Mixing Everything
As the sauce simmers, prepare the elbow macaroni as directed on the package, being careful to drain it thoroughly. You can stop here and just add a little more cheese if you want your mac and cheese on the stovetop extra creamy. But when you bake your mac and cheese, it becomes even more decadent.
Season and add the cheese.
Season the sauce with salt and pepper to taste. Now it’s time to add the shredded cheese. First, add in two cups of the shredded cheese and stir until it melts thoroughly. The leftover cheese will be used for layering and topping.
Cooking Pasta and Combining All Ingredients
Prepare the elbow macaroni according to the package’s instructions, making sure to drain it completely, while the sauce simmers. If you want your mac and cheese on the stovetop to be extremely creamy, you can stop here and simply add a bit more cheese. However, your mac and cheese gets even richer when you bake it.
Baking Duration
The mac and cheese should be gooey, bubbling, and have a hint of golden color on top after about 30 minutes of baking at 350°F (175°C). You can stop here, wrap the dish in plastic wrap, and put it in the refrigerator if you’re preparing it in advance. Take it out of the refrigerator an hour or so before baking to let it to reach room temperature. The baking time will be a little longer, perhaps 60 minutes.
The outcome: Macaroni and cheese that is ridiculously delicious
You will be rewarded with a decadent, creamy, and gooey mac and cheese once it has finished baking. The interior’s soft smoothness is perfectly contrasted with the crusty cheese topping. Because this mac and cheese is so creamy, you might prefer to eat it by itself without the accompaniments.
Ideal Combinations and Serving Ideas
There are several uses for this mac and cheese. It can be used as a side dish for family dinners, parties, or holidays, or it can be a tasty meatless main course. It can be served with a grilled protein or, for balance, paired with a simple salad to make it even thicker.
In conclusion
It takes some work to make the creamiest mac and cheese, but the rewards are well worth the effort. A dish that is genuinely decadent and fulfilling can be achieved by selecting the appropriate pasta, chopping your own cheese, and making a rich, creamy sauce. This mac and cheese will quickly become your favorite dish for a cozy, cheesy meal, whether it is baked or served on the stovetop.